메뉴열기
  • Firmware updates are released to improve the functions of our dash cams and can enhance your dash cam’s capabilities or fix bugs. 


    Firmware updates are frequently used for troubleshooting purposes if an issue occurs with the dash cam.

    By updating or re-loading the firmware, your dash cam’s current firmware is erased and replaced. 


    Updating Firmware on Windows OS


    1. Remove the SD card from your dash cam.

    Locate the full-sized SD card adapter provided in the original box. 


    2. Insert the SD card into the adapter, and then into your PC. 


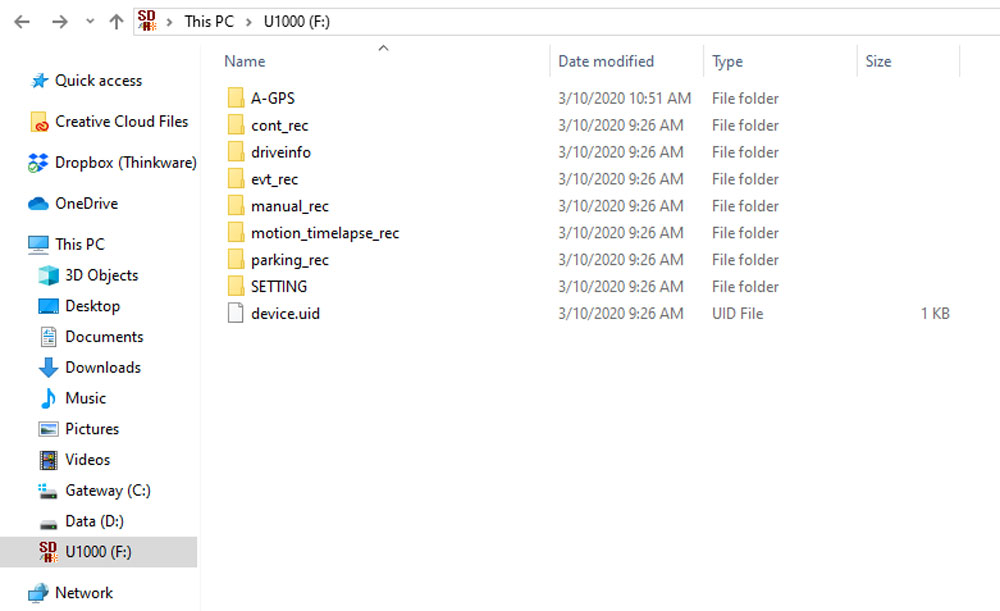
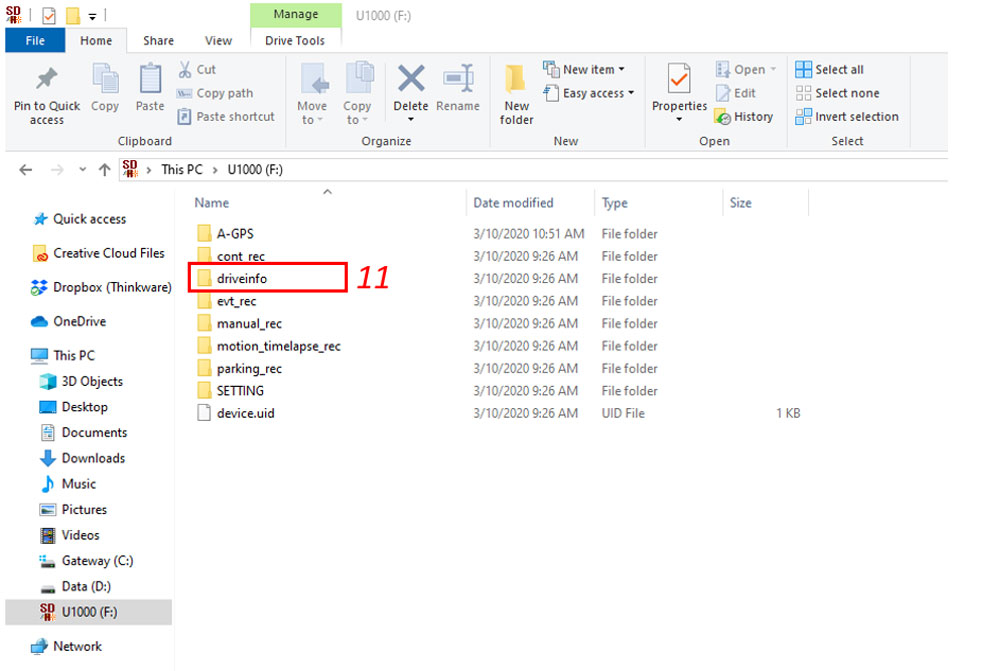
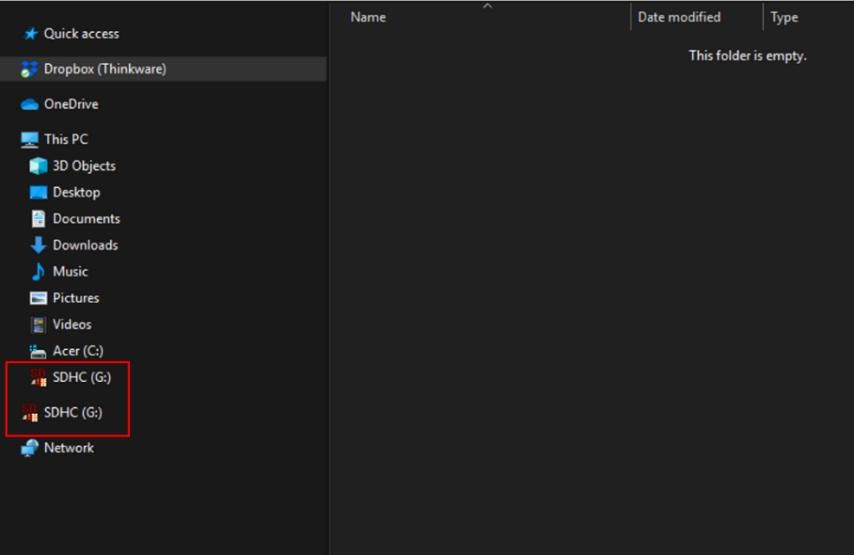
    3. Locate the SD card under the “My PC” section of File Explorer.  


    4. Format the SD by right-clicking the name and selecting format, then start.


    **Please save all crucial footage beforehand as formatting your SD card erases the entire SD card.


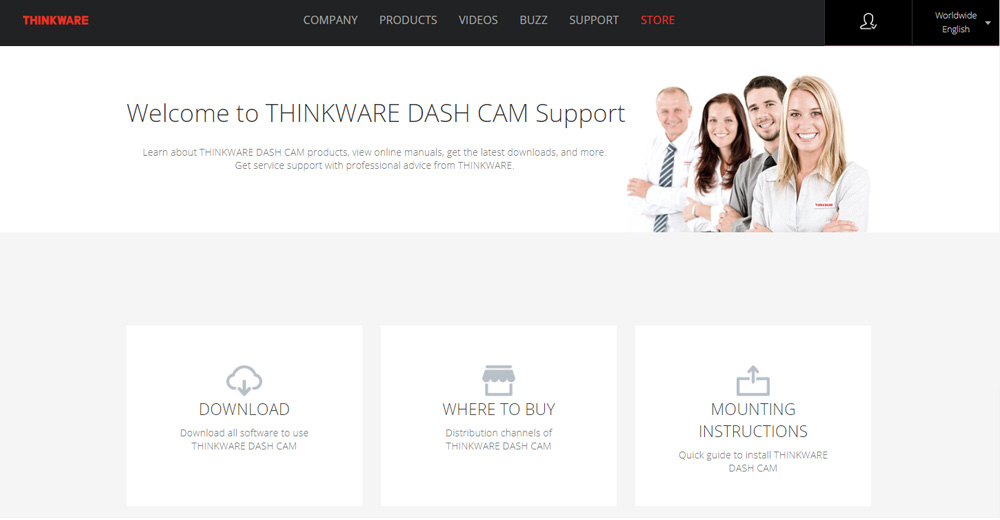
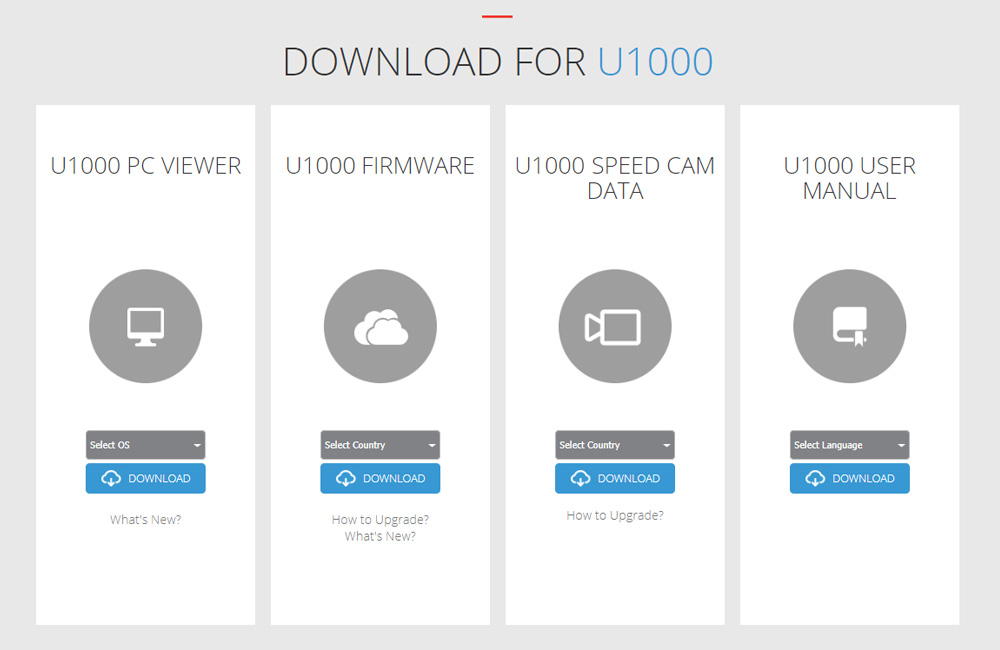
    5. Open your web browser and go to Thinkware.com and select “Support”, then “Downloads”. 


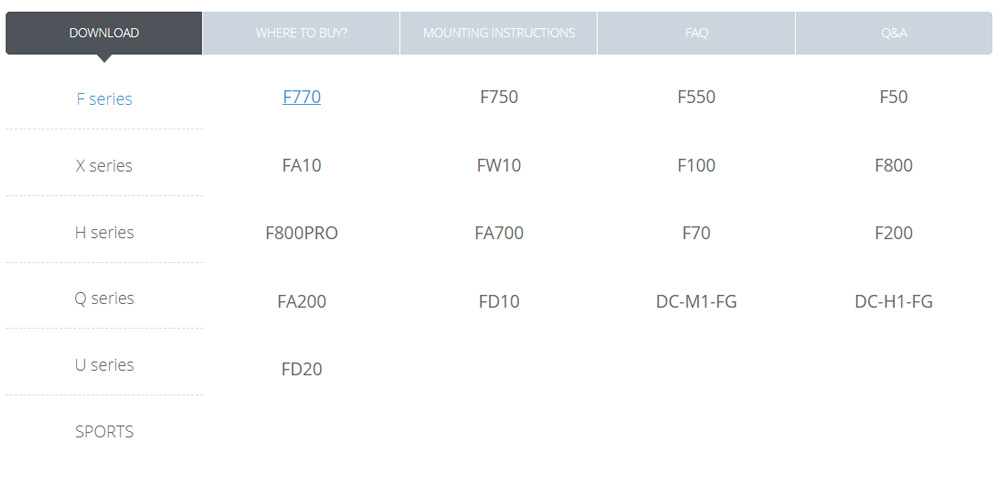
    6. Select your dash cam model and download the firmware file. 


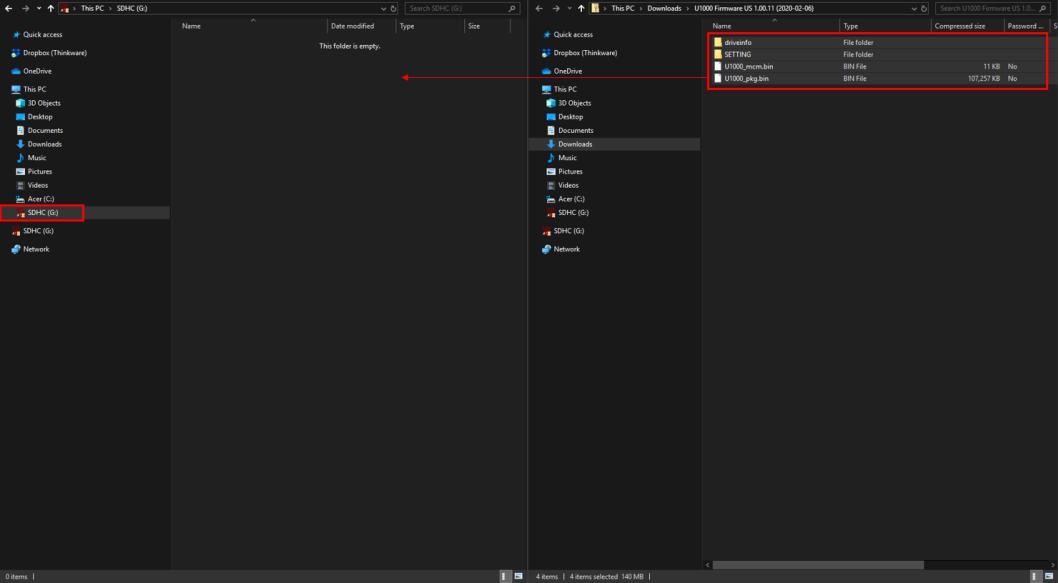
    7. Locate the firmware file in the “downloads” folder of your PC.


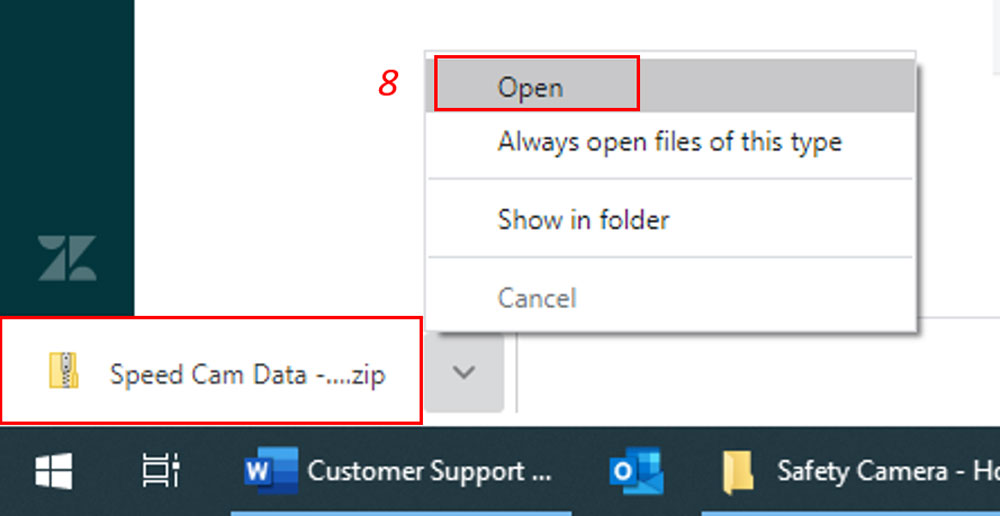
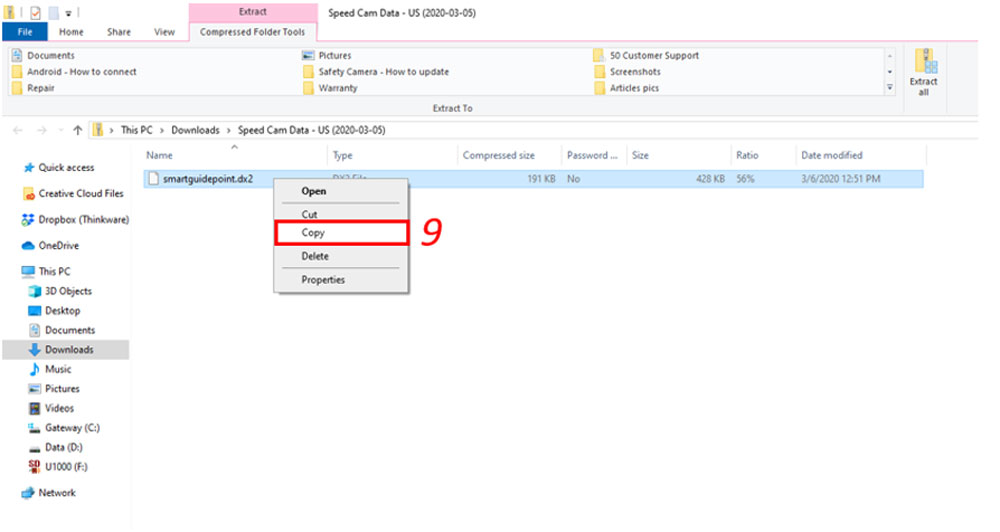
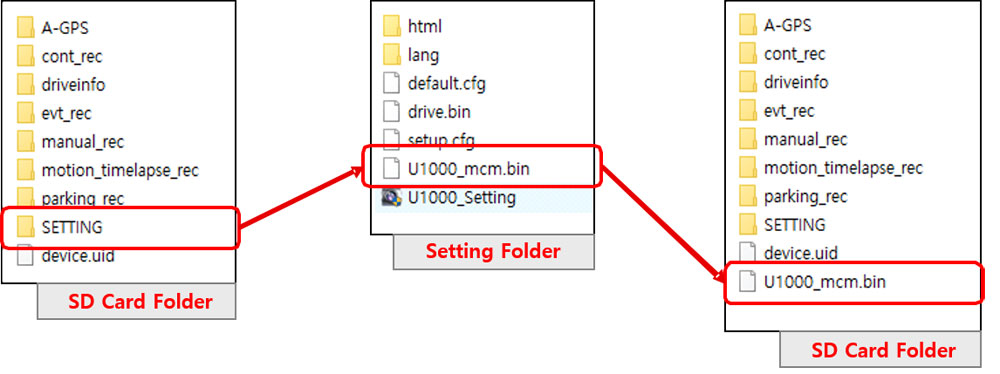
    8. Double click to open the ZIP file and copy all files.


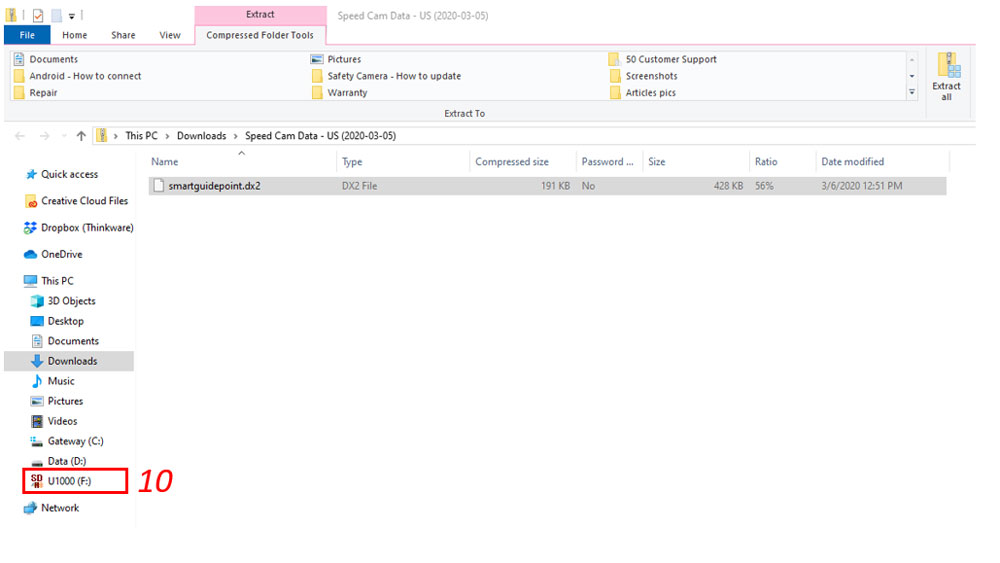
    9. Paste files onto the formatted SD card. 


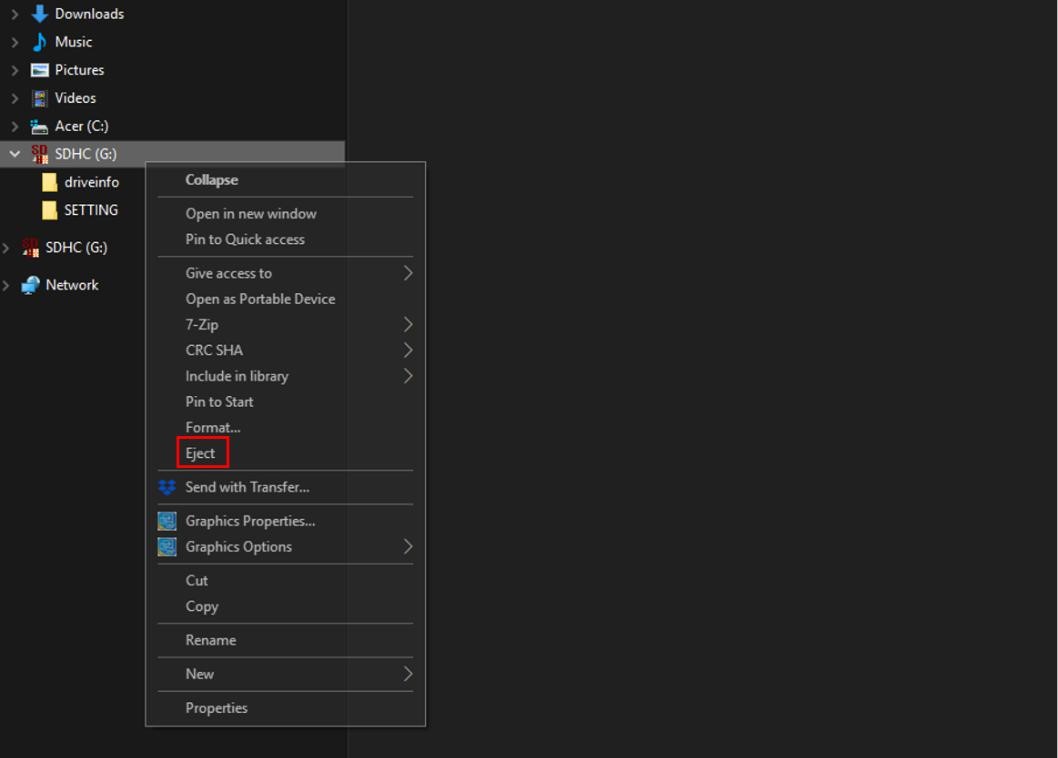
    10. Once copied, right-click the name of the SD card and select “Eject”. You can now remove the SD card from your PC. 


    11. Now that the firmware file is on the SD card, we need to upload this to your dash cam. Insert the SD card into your dash cam and power it on.


    Once the dash cam powers on, you will hear “Update will now start.” This may take a few minutes to complete. Ensure your dash cam stays powered on for the duration of the update.


    You are safe to power off or use the dash cam once you hear “Update complete. Continuous Recording will now start.”


    Updating the Firmware on Mac


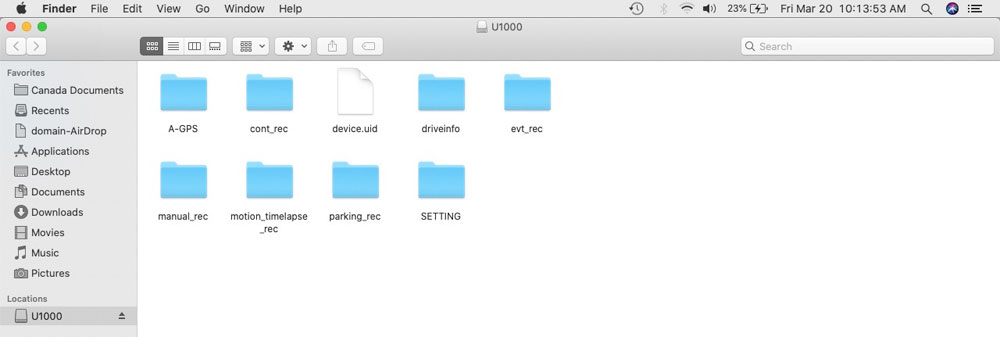
    1. Remove the SD card from your dash cam. Locate the full-sized SD card adapter. Insert the SD card into the adapter, and then into your Mac.


    2. Format the SD card.


    **Please save all crucial footage beforehand as formatting your SD card erases the entire SD card.


    3. Open your web browser and go to Thinkware.com and select “Support”, then “Downloads”.  


    4. Select your dash cam model and download the firmware file.  


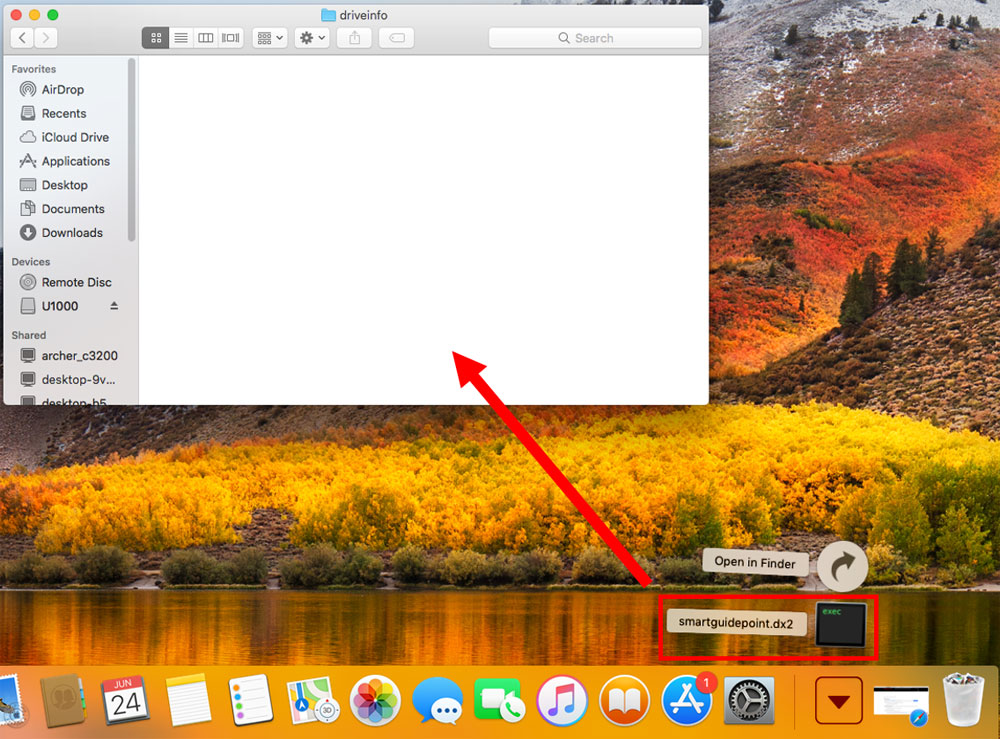
    5. Once the download is complete, open the ZIP file to unzip it.


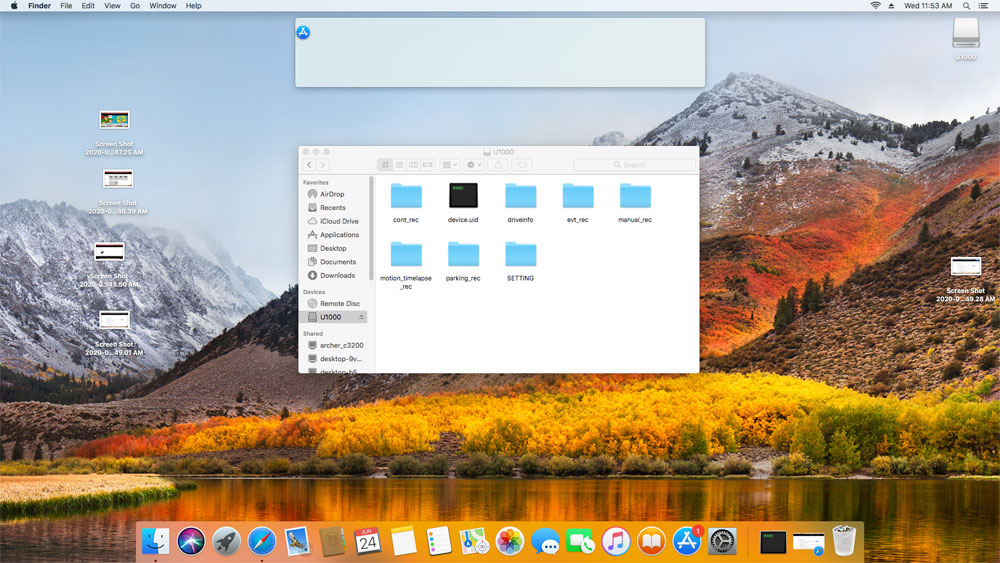
    6. Open the unzipped folder.  


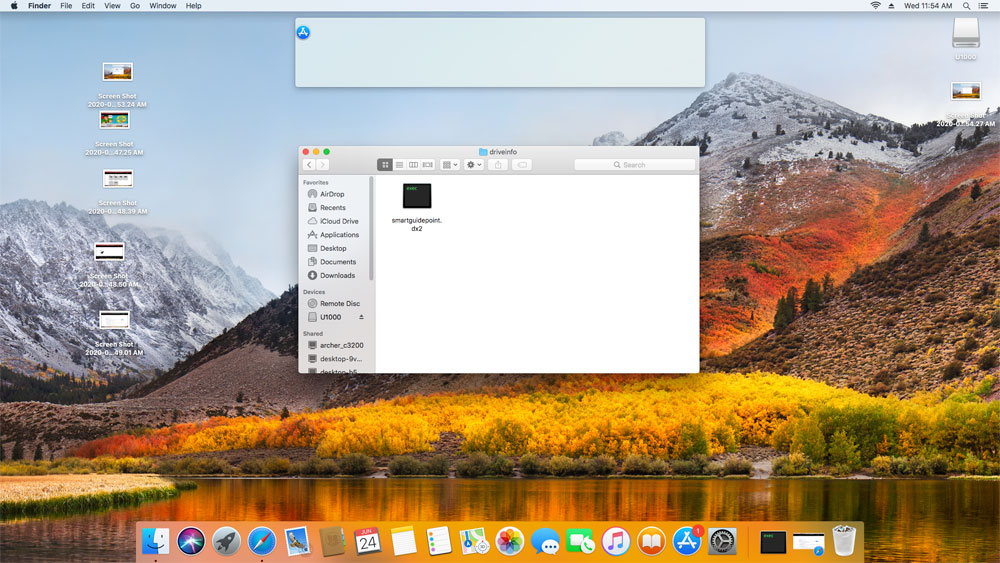
    7. Select all items that are in the folder and copy the items. 


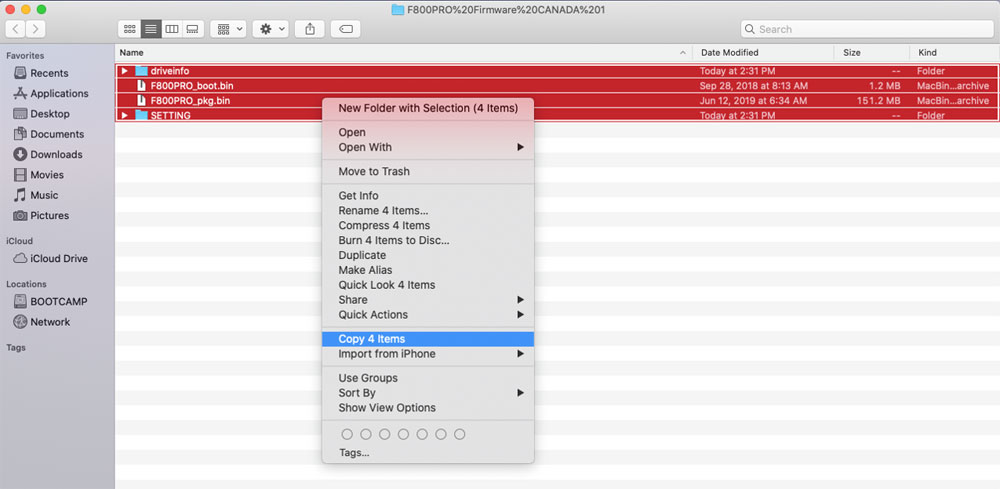
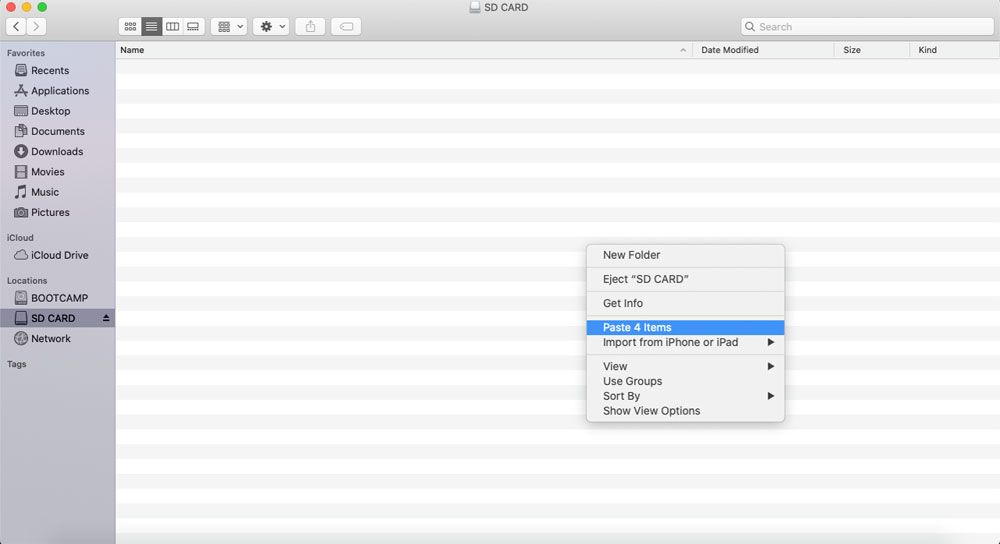
    8. Select the formatted SD card and paste the items.  


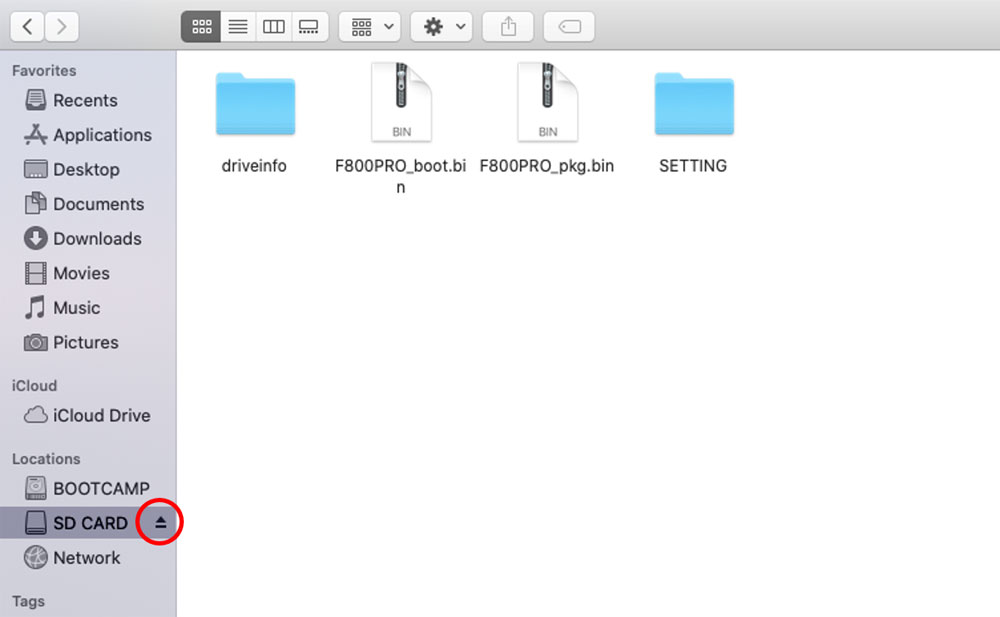
    9. Safely eject the adapter from your Mac, and then remove the SD card from adapter. Insert the SD card into your dash cam and power it on.  


    Once your dash cam powers on, you will hear “Update will now start.” This may take a few minutes to complete. Ensure your dash cam stays powered on for the duration of the update.


    You are safe to power off or use the dash cam once you hear “Update complete. Continuous Recording will now start.”


  • **The Safety Camera Data update must be done separately from the Firmware Update.


    Why update Safety Camera Data?


    The Safety Camera feature requires the use of GPS (built-in or external GPS antenna).

    Enabling the Safety Camera feature will allow the dash cam to sound warnings regarding speed cameras,

    red light cameras, average speed limits and mobile speed zones in your area.


    Does my dash cam have GPS?


    Dash cam model

    Does my dash cam have GPS?

     U1000

     Built-in

     Q800PRO

     Built-in

     F800PRO

     Built-in

     F800

     Built-in

     F750

     Built-in

     F770

     Built-in

     FA200

     Optional accessory

     F200

     Optional accessory

     F100

     Optional accessory

     F70

     Optional accessory

     F50

     Optional accessory

     X330

     Optional accessory

     X350

     Optional accessory

     X500

     Optional accessory

     X550

     Optional accessory

     X700

     Optional accessory


    How to update Safety Camera Data (Windows OS)


    1. Remove the SD card from your dash cam.
    Insert the SD card into the adapter, and then insert it into your PC.


    2. Locate the SD card under the “My PC” section of File Explorer.


    3. Open your web browser and go to Thinkware.com and select “Support”, then “Downloads”.


    4. Select your dash cam model and download the speed cam data file.


    5. Once the download is complete, open the ZIP file. 


    6. Select and copy the “smartguidepoint.dx2” file.


    7. Once copied, return to SD card folder and open the "driveinfo” folder.


    8. Paste the “smartguidepoint.dx2” file into the “driveinfo” folder.


    Once you are done, safely remove the SD card from your PC and insert it back into your dash cam.

    Your dash cam will normally power on and you will hear "Continuous Recording will now start."


    Updating the Safety Camera Data on Mac


    1. Remove the SD card from your dash cam.
    Insert SD card into the adapter, and then insert it into your Mac.


    2. Open the SD card folder.


    3. Open your web browser and go to Thinkware.com and select “Support”, then “Downloads”


    4. Select your dash cam model and download the speed cam data file.


    5. Once the download(smartguidepoint.dx2) is complete, go back to the SD card folder and open the folder “driveinfo”.


    6.  Select and copy the “smartguidepoint.dx2” file and drag it into the driveinfo folder.

    **If you already have a file named smartguidepoint.dx2 in the folder, replace it with the recently downloaded one.


    7. Ensure that smartguidepoint.dx2 is in the driveinfo folder. 


    Once you are done, safely remove the SD card from your Mac and insert it back into your dash cam.

    Your dash cam will normally power on and you will hear "Continuous Recording will now start." 


  • Upgrade Firmware via hotspot.


    1. Connect to the Thinkware Cloud App via hotspot connection.


    2. In the app, click the “More” menu.
    Click “Support”, and then download the firmware under “Firmware Download”.


    The firmware download may take a few minutes depending on your hotspot connection.


    3. Once the download is complete, the dash cam will upgrade and reboot. You will hear “Successfully updated” if the firmware upgrade is successful.


    **The below process is only required once.


    1. Insert SD Card into your PC.


    2. Open the SD card folder and go to the “SETTING” folder.
    Copy the “U1000_mcm.bin” file and paste it onto the SD card root folder.  


    3. Once copied, delete the “U1000_mcm.bin” file from the “SETTING” folder.


    4. Insert the SD Card into your dash cam and turn on the ignition.


    5. Firmware update will begin and you will hear “Successfully updated” once completed.


    **Check your Firmware Version.


    1. Open your Thinkware Cloud App and click the “More” menu.


    2. Click “Dash Cam Info” and check the details of the “Firmware Version” and “Micom Version”.

    The Firmware Version: v1.00.11
    Micom Version: 48